Showing posts with label Antler. Show all posts

Sunday, 19 August 2007

Two New Creations

Nothing great to report. I've been gathering some nettle fibres for fishing lines, a carrying net and a fishing net. I have tested some new techniques for making willow basketry, since this was a crude attempt at a burden basket I will not post anything about the techniques I've tested them further and gotten better at it.


Both Patrick McGlinchey and Jon_R have recently been experimenting with coiled basketry and that has inspired me to give it a go. To start on this type of project I needed to make a needle first. This one is out of a thin, flat section of reindeer antler. I expect the thinness to be an advantage in this kind of work.

Saturday, 11 August 2007

Small and Simple Antler Comb

Start by scoring and breaking off a palm of antler. The antler in question here is reindeer/caribou antler. As usual, use hot water when working antler.


Score or scrape along the edges so you can split the piece with a wedge. My split wasn't totally successful, but I actually think the result got better because it ran off. It gave a stronger handle.


Start scoring the teeth.


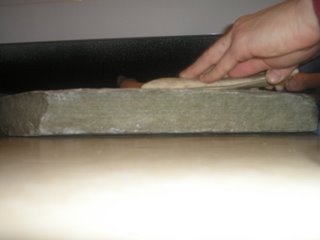
The teeth should be rombic in cross section and of course have a little spacing in between. This you can achieve by scoring, splitting and abrading with a rough piece of quartzite between the teeth.


The handle was engraved with a stone flake. Take several turns, score first superficially, then deepen the grooves. The grooves can be highlighted with a mixture of charcoal and wax (best in my opinion) or charcoal and fat.

Wednesday, 1 August 2007

Hide Scraper

Making this type of hide scraper is easy. First score around the edge of a reindeer/caribou "skovle" (what we call the flat pieces of the antler here). Brek off the irregular front and then score along the sides. As usual, using hot water will help you a lot. Split the piece along it's lenght. Tidy it up and make the lower edge sharp.


This type of scraper is quite effective, but the width is too large for my strength at least. Adding a long handle to it would make it better of course, since you then could put a lot of weight into it. It is used with a chopping motion, or by forcing the corners under though points. These scrapers were used to scrape both the flesh and hair side of the skin of the new coracle/currach/bullboat I've been making for the museum. A post about that will hopefully be up within very few days.

Sunday, 3 June 2007

Arrowsizer

Here is the arrowsizer I started making before Christmas. It is carved as an eagle flapping it's wings. More detail may be added when I feel my skill is up for it. I think it looks acceptable regardlessly though.

Sunday, 22 April 2007

Moose Antler Axe in Action

Here is footage of my recently reworked moose antler axe in action. It is very heavy and packs a punch. I need a new shaft though as you can see it almost popping off all the time. It is also split. The tree (a dead, dry spruce) took about 10 minutes to get to the ground in total. A little slower than a dull steel axe. Thanks to Halvor Hylland Olsnes for filming.


Here is a photo of me chopping down a goat willow tree. The tree was down in two minutes approximatly.

Monday, 12 February 2007

On the Use of Antler Axes

The last half year or so, I have only used antler axes, no metal whatsoever. During this time I have made quite a few observations on them. Compared to stone axes, antler axes have mainly two advantages:
  • Ease of construction (softer material, "axe shaped")
  • Ease of repair (softer material, can be repaired by scraping with flakes)
Their major disadvantage is that they dull more quickly. On a newly sharpened antler and a stone axe, there is however no difference in sharpness. If there is, I would say it goes in the favour of the antler axe. Below: Flattening a piece with a diagonal antler axe.


There are primarily two styles of edges on these axes, the diagonal edge, the elk(US: moose) axe and the hafted slab. As antler normally has a pith, the first and third options are normally the only ones possible. That especially accounts for red deer antler, which has a very extensive pith.

The diagonally edged axe is quite quick to make. The fixed direction on the edge makes it very suitable for wood working, but not for heavy duty chopping. For small trees it works fine, but if you have to lean into the blow, you risk splitting or chipping the antler towards it's weakest direction, making repair a monumental task.


The elk axe is a much more stable axe, it is ground to a centered bevel like a standard metal axe and is therefore good for heavy duty chopping. This axe is as a general rule only possible to make out of elk antler, due to it being solid and extremely hard near the base. The superior weight of the elk antler also adds into the equation. Due to it's hardness and the sheer amounts of materials that needs to be removed, making this type of axe is a major undertaking. My elk axe is under remake, I will try to remember to post the appropriate pictures when it is finished.

The slab type I have limited experience with, I just made a quick one this fall and it didn't hold up for too long. This type lacks the weight of the former ones, but the narrow blade offers even greater precision and better cutting ability.

Hitting rocks is total death on bits, whether it is antler or stone, though even more so with stone. A way to avoid this is to make high stumps, that keeps the edge as far away from the ground and the rocks as possible.

The good ratio between hardness and flexibility is what makes antler such a good material for axes. Flexibility is completely lacking in stone and makes chipping more likely. However flexible, red deer antler (or degraded reindeer and elk antler) is on the margins of what is usable, it is too soft I feel and the extensive pith makes it prone to splitting. Use top grade reindeer or elk antler if you can get it. It is most likely that I will continue to use antler axes in the future, they arn't as good as metal, but then again nothing is.

Thursday, 25 January 2007

Antler Dagger

I always have plenty of antler tines and other leftover pieces that lie around unused. Being a little busy these days, I thought making an antler dagger, more or less like in the movie Braveheart would be a good idea. Below: The antler piece soaking.


First I split away most of the soft core.


The rest was carved away with one of the big, nice flakes I have traded for some sinew. Thank you Kevin.


The tip was abraded on a stone and the sharpest edges rounded in a similar fashion.


It may not look that much like a dagger, but has more the function of a primitive fighting glove. I expect it would do serious damage.

Thursday, 18 January 2007

New Fishing Hook

Little to write about these days. I have made another fishing hook of antler. I don't like the proportions of it, but it's usable. This time I used Patrick's method. Seems like I am going to stick with my own, I like it better.


And also, I have this bad habit when making hooks. If there is room in the width of a piece, chances I will use it, even if it doesn't give good results. The blanks I have ready now, I will halve. Hopefully that will make me do it properly.

Friday, 12 January 2007

Antler Fishing Hook

My method is derived from the method of Patrick from Backwoods Survival School, although I do it slightly differently. I have yet to try his method completely, but I suspect it may be better, especially on smaller hooks.

As in all antler works, soaking the piece in warm water when you don't work it will make the work much easier. Antler is easier to make into a hook in my opinion and can be made thinner due to more flexibility, but bone soaks up water slower and thereby retains it's sharpness better. I have found that if you choose a piece that is rounded in the first place you will automatically achieve the profile Patrick claims to be advantageous in his tutorial.

Start by drilling a hole in the blank where you want the bottom of the hook to be.


Drill a sequence of holes upwards until you have the depth of the hook.

I run the hole out the side, while Patrick runs it out on the top. The pith should be split away first, it will make it all a lot easier. Score between the holes, but save half of a "bridge" for a barb.


Scrape out inside of the hook as you want it.


After the inside looks like a hook at the right dimentions, score and carfully split off the excess on the outside of the hook. Scrape it smooth and round the edges. If you haven't already done that, carve in a bigger recess under the barb to give it better function.


Let the hook dry and sharpen it well.

This hook is the biggest I have ever made and is 6cm in lenght. My experience with metal hooks tell me that hooks around 1-3cm are the most effective on trout, so that is where most of my hooks are and most of the future ones will be. This one is specifically aimed for sea fishing this summer.

Here is the finished hook.

Thursday, 11 January 2007

Splitting Antler

Antler is a lot of work to split, but much easier than I first thought when venturing into those realms. Remember throughout the process that using water eases the process a lot, that includes the splitting. Below: The wedge (on top), the split piece, and the antler hammer.


First you need to score or saw around the tine into the core. Breaking it off is then easily accomplished by putting stress on the point where you have sawed.


You can either free the piece in both ends first or just one end and then start scoring the paralell grooves.


Photo: Sawed off and have started to groove the lenghts.


Score or drill a little depression to take the wedge.


If you split the piece into three or more, a round wedge is best suited to accomplish the splitting. That can just be a regular tine. If the piece is only split in two like this one, you are better off with a flat one, but such a piece is hard to find unless you already have split a piece before. So you may either have to get by with a round one or one made from hardwood.

Thursday, 28 December 2006

Arrow Sizer Update

I know there is a lot of projects that are half-finished now, but please bear over with me, I will finish them eventually. :-) Some of the projects are quite substantial and much of it takes quite a lot of time so I will only post when I reach important tresholds in the process.

This is going to be an antler arrow sizer a little out of the ordinary. I want to carve an eagle out of the tines. I have an idea of how it's going to look. We'll see if it turns out that way too.

The first step is to scrape grooves into the soft core and break it off.


Next the break is ground smooth.


Drilling the hole to pass the arrow through is done with the recently made drill.


That's all of the progress for now. Hopefully I will be able to finish the bow-blank in a few days and post further progress.

Saturday, 23 December 2006

Bone and Antler Arrow Points

Finished two points the other day. One are made of reindeer antler and the other of sheep bone. They are narrow because of these materials' inferior sharpness and I will not use them for anything over the size of roe deer or perhaps reindeer due to the probable lack of bleeding qualities.


Have anyone tried making Plains Indian style arrow points from hardened hide or sinew? Just for a curiousity I tried that once. My results were far from satisfying, so if someone has an idea on how it was done, please tell me.

Antler Axe Repairs

Antler axes work wonderfully when sharp. A newly sharpened axe chops down wrist thick trees in short order. But they don't keep their edge very well. Also there is the risk of more major chipping and splitting, making labourious repairs neccesary.

My double edged antler axe has one edge that is too weak, even after a recent major reparation it has now cracked and chipped again. The other edge holds up well, but I have decided to rework this axe into a tranchet axe as soon as I get hold some decent sized good flaking stone for the bit. This photo shows the too thin wall of hard material on the right side, which is the bit. If you look closely you may also see that the edge has cracked and chipped.


Another development on this front is that the big antler axe on this photo finally has been ground to a usable bevel, even if it still is a little broad.

Sunday, 10 December 2006

Antler axes

Antler axes have several advantages over stone axes. Ground stone axes take a lot of time to make, not to mention the time involved in finding a river cobble that doesn't require an enormous effort to shape. Any type of good flaking rock is hard to find in Norway, so I wouldn't waste a good piece on a flaxed axe. Antler is unlike stone, a renewable resource and is relatively easy to find and shape.

There are several options when making these kind of axes. You can make one with a "diagonal" edge or use the centre of the rosette close to the base. I have made both, but have yet to test the last type. Adzes are also possible to make with antler, but is still on my "to make" list.

When choosing type of antler:
- Roe deer antler is generally too small.
- Red deer is a little weak, but will work for the diagonally edged type.
- Reindeer (caribou) is excellent for the diagonally edged type, but could possibly be used in the ordinary way too.
- Elk (moose) is the best for the one with an ordinary central bit and would be too big for much else.

To make the axes, score and split everything to as close dimensions as you can, that will save you a lot of work grinding. On the big elk axe head I have spent extremely much time grinding the end to a bevel, I would have saved myself a lot of work by scoring and cutting a little more. But anyway, the base end of elk antler, is extremely hard! Even drilling the holes will take a lot of time. Bone is said to be usable too, but isn't nearly as flexible as antler and is consequently much more likely to chip.

On one of my axes (middle) I took advantage of a limb on the antler (from a big stag) and used that as the handle. The elk axe is yet unhafted and the lower one is also of red deer.


Don't use an antler axe on hard, dry wood. Or for limbing spruce. The one with the seemingly thin shaft (which works great by the way) has been severly damaged from using it for that purpose and will need a lot of grinding to become usable again. On spruce limbs: Use a heavy batton to break them off. Spruce limbs are just as easy to break that way as by chopping them.
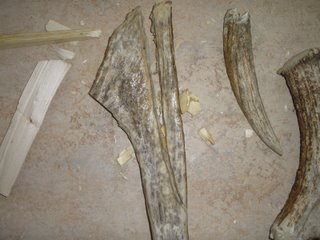
Antler axes and beaver tooth knives are natural choices for the abo living in a stone-poor environment (like Norway). Conserve most of the stone you have for working antler, bone and butchering. I have managed for 6 years or so with less than a kilogram of flint. That is achived by using all available edges on even small pieces and not reducing them into bifaces and finally drill-bits or arrowheads until these edges are worn out.

Thursday, 7 December 2006

Ice Fishing Stick Update

The antler rod eye is a neat thing I picked up from Patrick McGlinchey from Backwoods Survival School. Making them is rather easy, but don't do like me and choose a tine. A stem portion of female reindeer would be a lot better, since tines are frequently solid all the way through.

First start by scoring out the layout of the eye on the antler.


Score through the angled piece.


After that is done, split it with an antler wedge.


The eye is abraded on a rock to get the desired shape as that is more easily accomplished while it is still attached in the other end. Next by using the two saw flakes on the photo, I had to saw almost all the way through. A very good reason to choose a piece of antler with a pith.


The hole I drilled by holding it with my toes. I ask for apologies if my rather hairy toes prove to be offensive to anyone. :-)


The finished piece is bound to the the stick itself piece with a few strands of nettle. I'll see later if I will pitch the wrapping, but in essence, the stick is ready to use.

Thursday, 23 November 2006

Ice Pick Update

The ice pick is now ready to be fitted into a pole. The second hole has been drilled and I have found myself an old, ruined bowdrill-string of sinew that I will use for hafting it. Everything from here is lashing and wood-working.

Tuesday, 21 November 2006

Ice Pick Update

Yesterday and today I have mostly been engaged elsewhere, but I am nearly finished with the ice pick head. I have drilled a hole through the piece, but due to blisters (haven't been using the handdrill much lately) I can't drill the last hole in a couple of days.

So, instead I ground the blank to it's finished state. When the last hole is drilled, the antler working part of this project is finished.

Sunday, 19 November 2006

Ice Pick Update

My plan is to follow every step in the process of making most of the things I do in detail. I will however only follow one similar project at the time. This project is already started, because of that pictures from other similar projects have been included to describe the processes needed to get there.

Scoring antler. Seems tedious, but if you have a rectangular edge on your piece of flint it is surprisingly fast. To speed things up soak the piece every few strokes in hot/warm water. I often resort to saliva and that works fine too. A tip on getting a straight line, start the groove by guiding it with your opposite thumb-nail.

Score right through to the pith. That will make splitting or breaking easier, but it is possible to get a fairly dependable break with out having scored perfectly.


Breaking is self explainatory so I will jump straight to splitting. First, make a some indentions with an antler wedge where you want the split to start. To not ruin your antler wedge or blank (hard against hard is bad) use strong wooden wedges instead. They can be easily made from any hard wood, with little effort. While good antler wedges can take hours of scoring and grinding. continue until you are through. If the blank is hard to split, you may have to hammer in wedges from the sides as well or if the starting wedge wasn't thick enough; hammer in one more from the starting point. Also, make sure your blank is well soaked in before you start and soaking it every now and then throughout the process will help a lot.

The current antler project in display is the Ice Pick. Photo of the stage I am at here. The piece is a little curved to one side. So to make sure that the force of the blow (when chopping the ice) will go straight into the shaft, I decided to make the edge go over at one side. It was scored through, mostly from one side, but a little from the other too and broken off easily against a hard object.

Next step will be to drill holes for the hafting.